Adding the First Video Source
Overview
Before ITVDesk can function as a virtual ONVIF IP camera, at least one IP camera configuration and video source must be created.
This process consists of two main steps:
- Configuring the IP Camera (ONVIF & stream settings)
- Selecting and configuring the Camera Media Source
This section explains both steps in the correct order.
Step 1 – Creating a New Virtual IP Camera
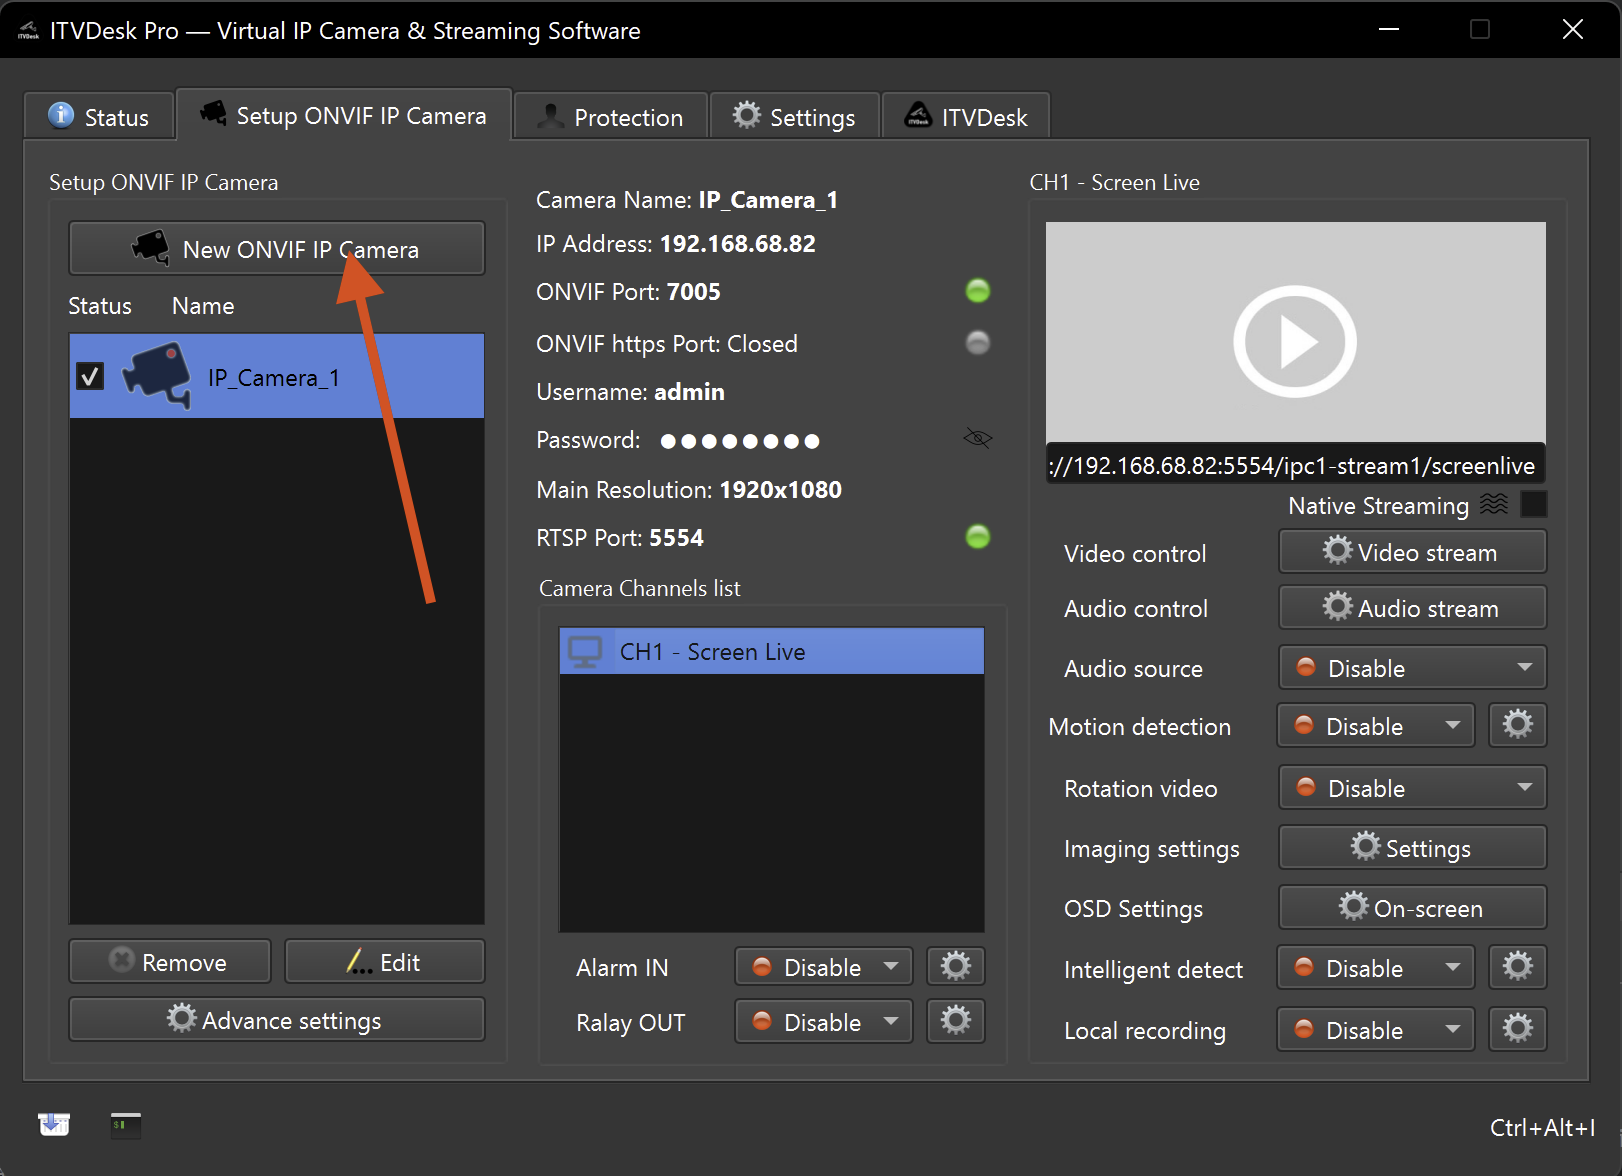
To add your first video source, you first need to create a new virtual ONVIF IP camera.
- Open the ITVDesk application
- Go to Setup ONVIF IP Camera
- Click New ONVIF IP Camera
This opens the IP Camera configuration dialog.
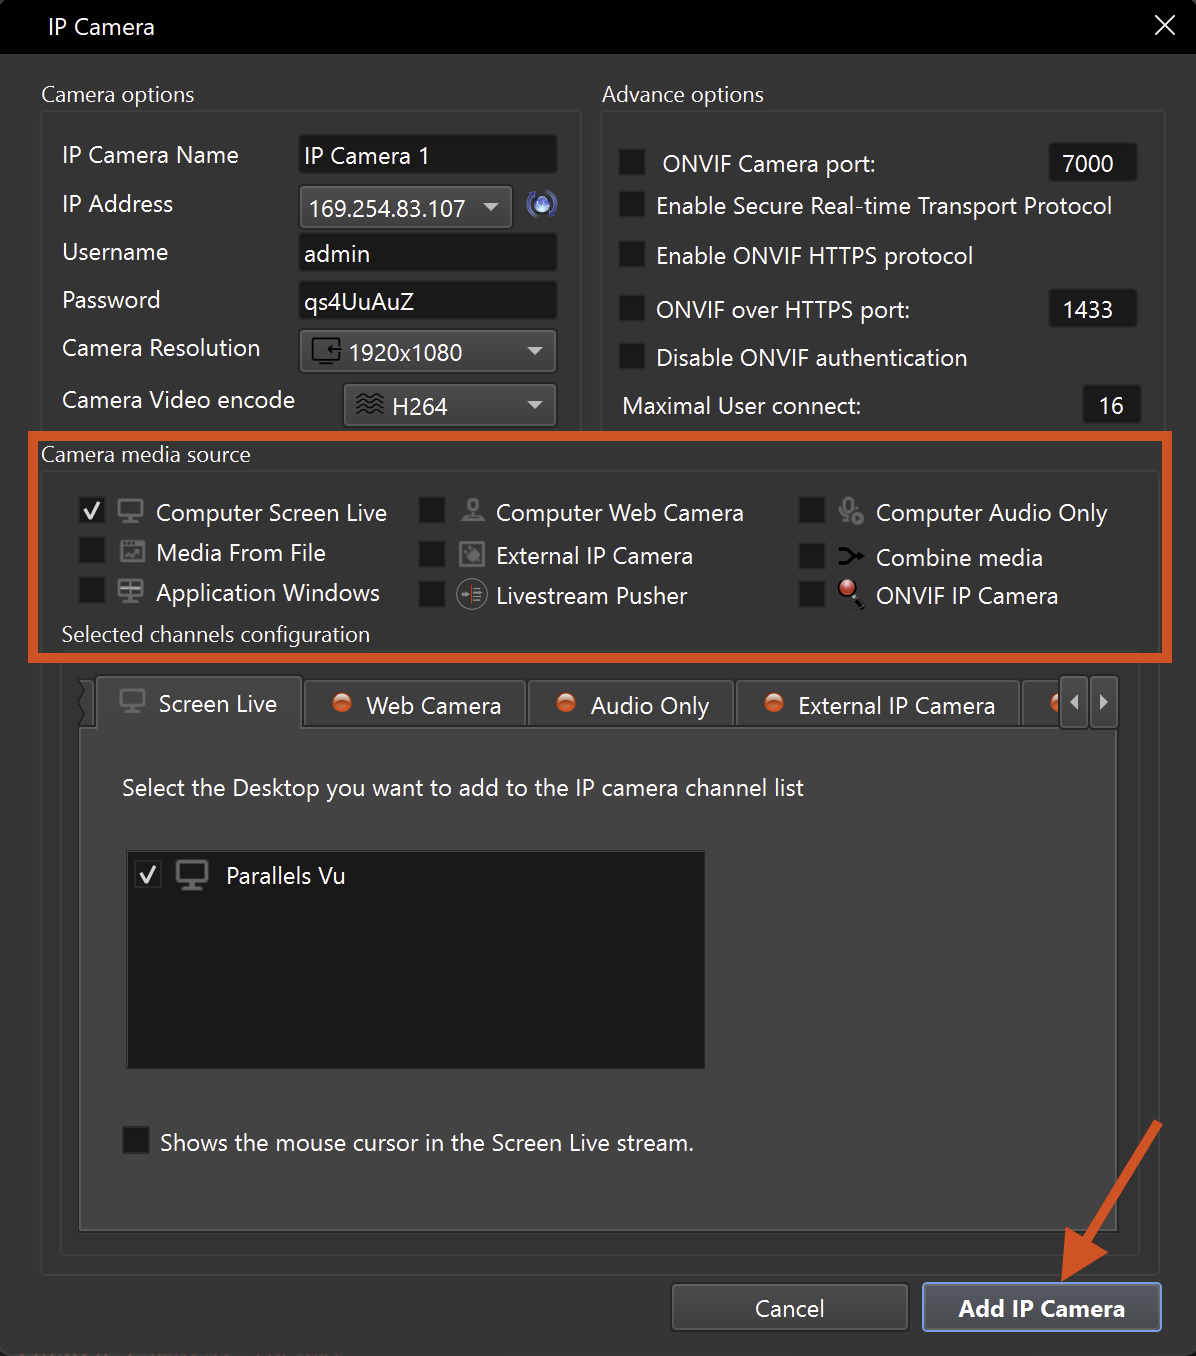
IP Camera – General Settings
The upper part of the dialog defines how the virtual camera behaves on the network.
Camera Options
-
IP Camera Name
Logical name shown in ONVIF clients and VMS systems -
IP Address
Network interface used to listen for IP camera services (important on systems with multiple network adapters, supports IPv4 and IPv6) -
Username / Password
Credentials used by ONVIF, RTSPS, and RTSP clients -
Camera Resolution
Default output resolution of the virtual camera -
Camera Video Encode
Video codec (H.264 / H.265 / MJPEG / JPEG)
Advanced Options
-
ONVIF Camera Port
Port used for ONVIF services (default: 7000) -
Enable Secure Real-Time Transport Protocol (SRTP)
Enables encrypted RTP media transport -
Enable ONVIF HTTPS protocol
Enables secure ONVIF communication -
Disable ONVIF authentication
Allows anonymous ONVIF access (not recommended for production) -
Maximal User Connect
Limits the number of concurrent client connections
These settings define how the camera is exposed to the network and should normally be configured before selecting a video source.
Step 2 – Selecting the Camera Media Source
The Camera Media Source defines what content is streamed by the virtual IP camera.
This section is highlighted in the dialog below:
Supported Camera Media Sources
ITVDesk supports the following media source types:
- Computer Screen Live – Full desktop capture
- Application Windows – Capture a specific application window
- Computer Web Camera – Local webcam
- Computer Audio Only – Audio-only stream
- Media From File – Video or image file playback
- External IP Camera – RTSP / RTSPS / SRT / RTMP streams
- ONVIF IP Camera – External ONVIF-compatible camera
- Livestream Pusher – External live stream input
- Combine Media – Mix multiple sources into a single stream
One or multiple sources can be enabled, depending on the selected configuration.
Finalizing the Configuration
After configuring:
- IP camera settings
- Media source selection
- Media source parameters
Click Add IP Camera to activate the configuration.
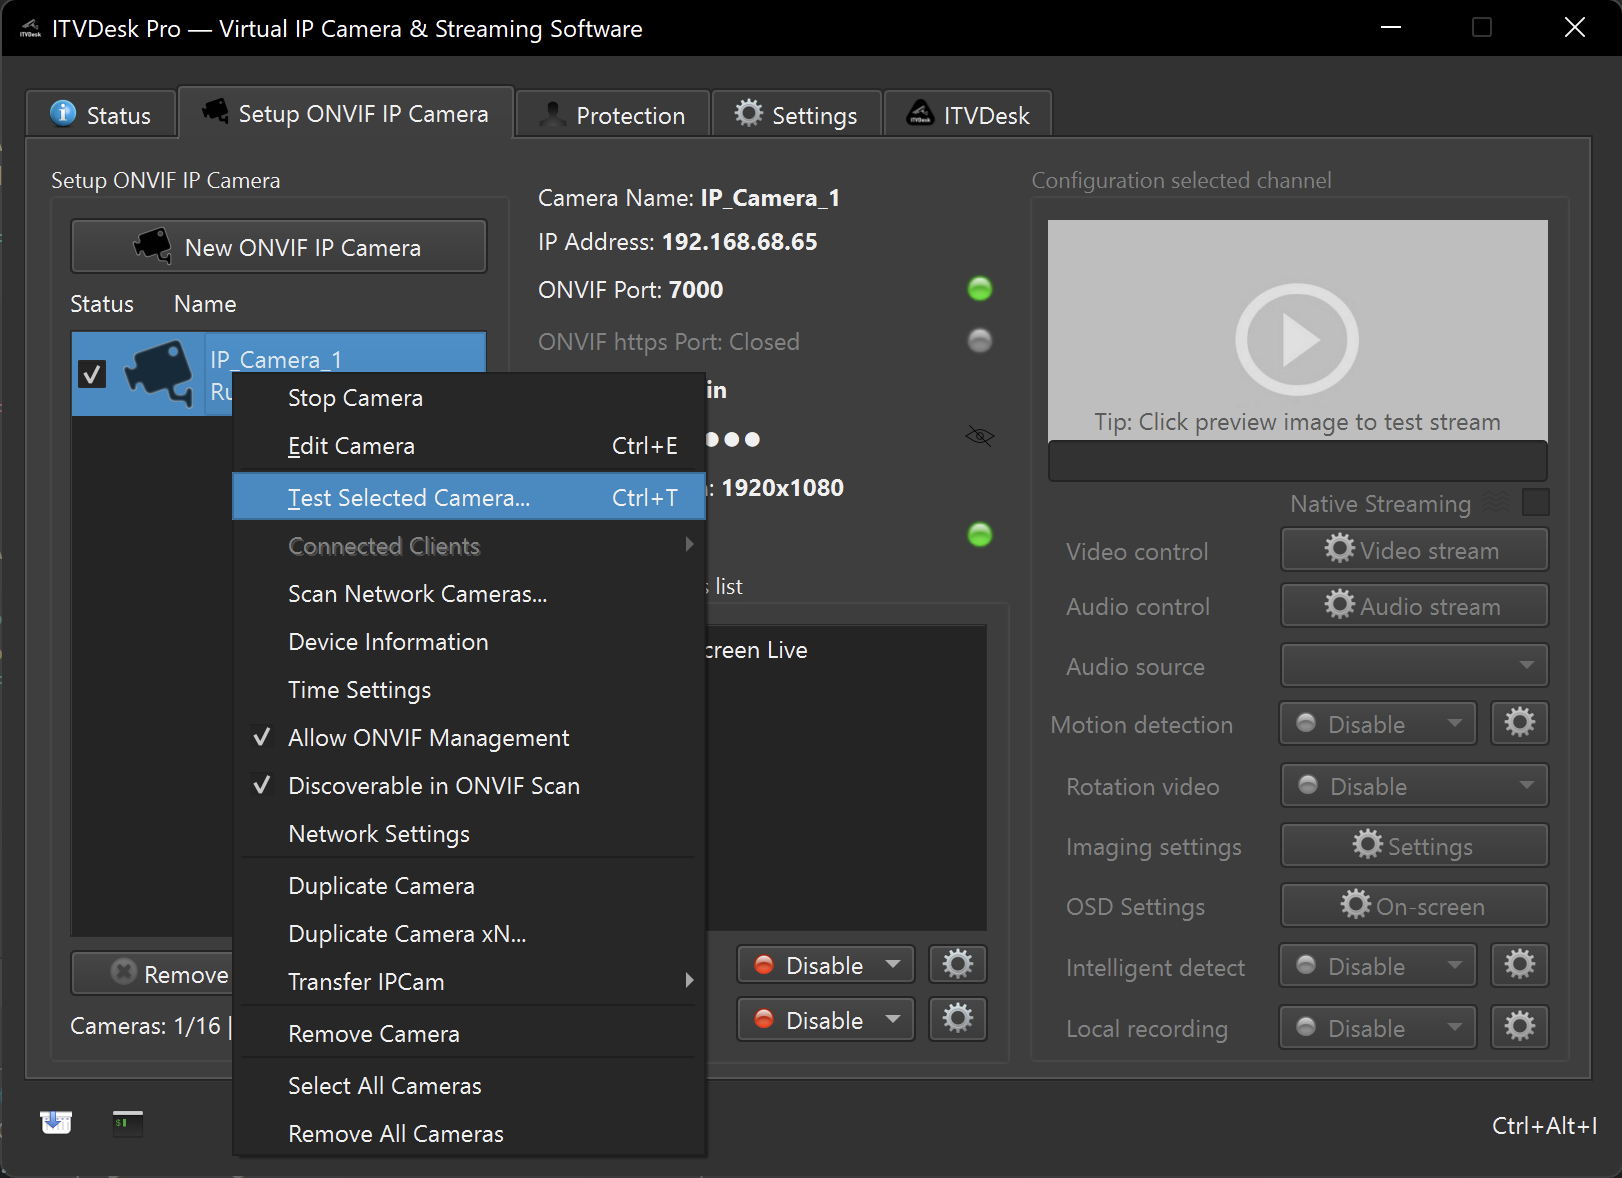
After adding a new virtual camera, run Network Camera Test to confirm end-to-end readiness.
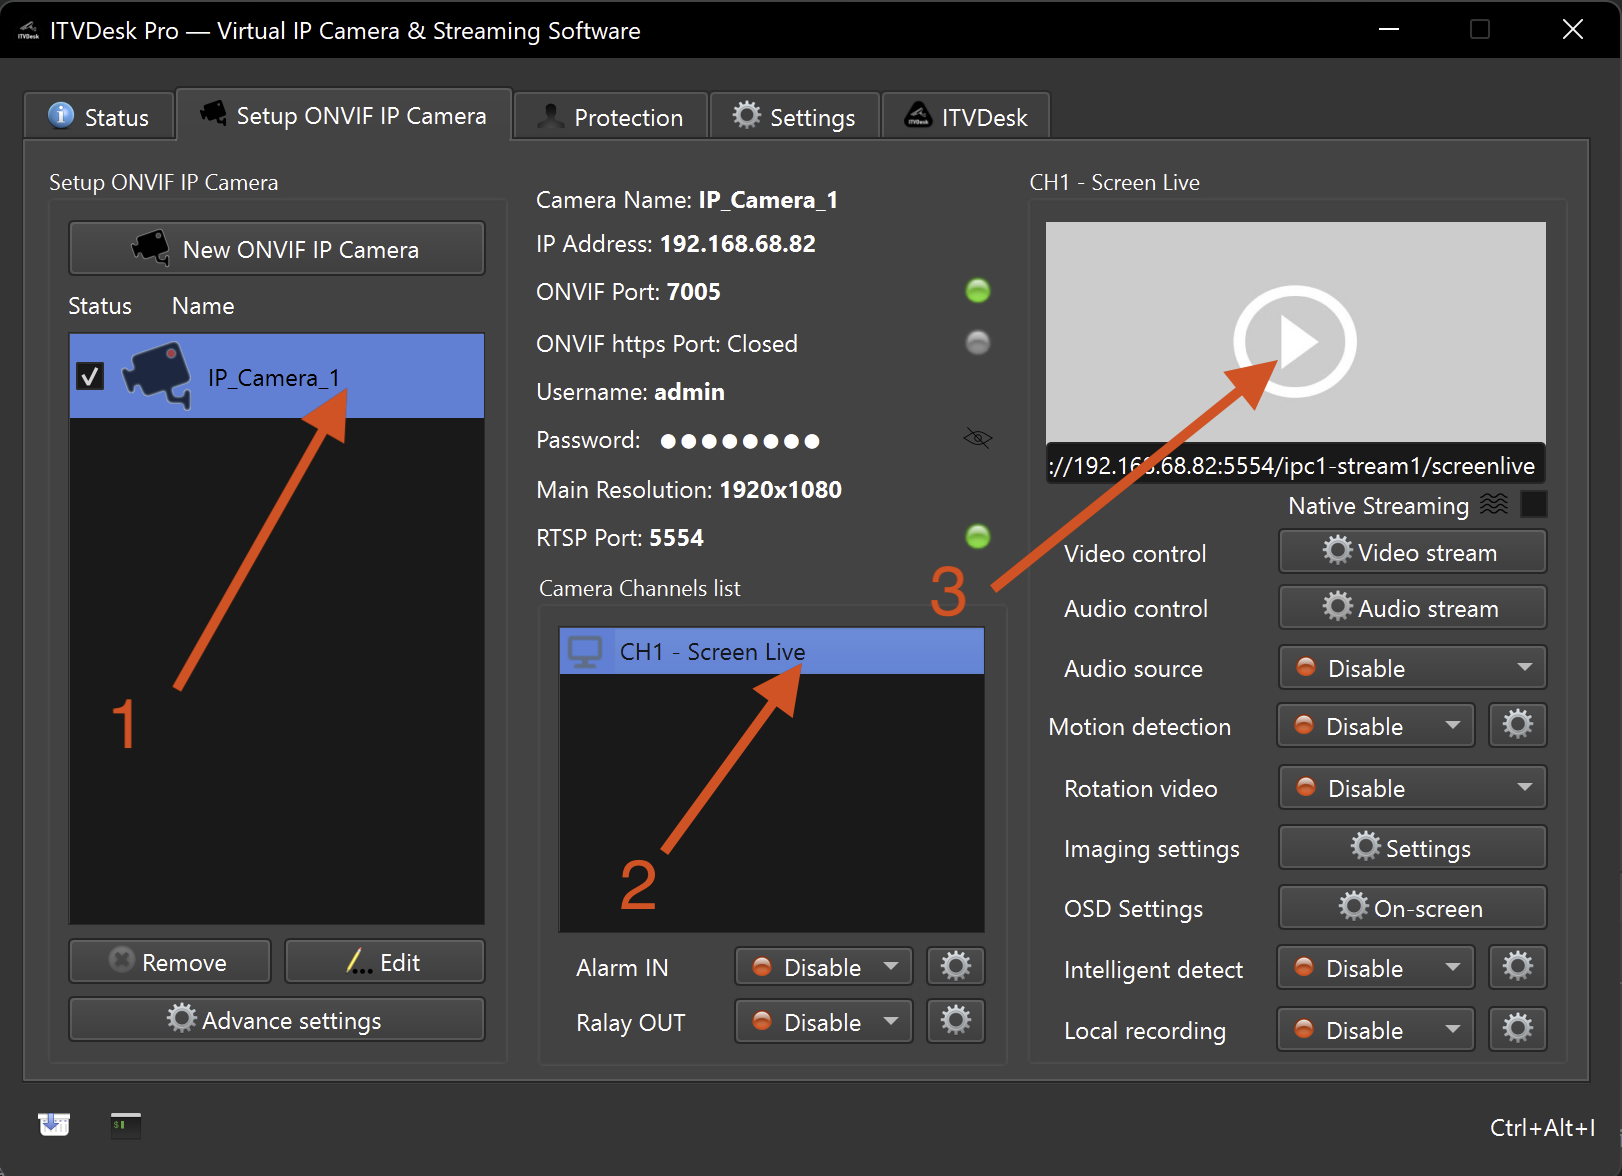
The virtual camera becomes immediately available via:
- ITVDesk User Interface
- ONVIF discovery
- RTSP / RTSPS streaming
- Local recording (if enabled)
Next Steps
After adding the first video source, continue with detailed configuration guides:
👉 Desktop Capture
👉 Application Window Capture
👉 Webcam
👉 Combined Media Stream
👉 External RTSP / ONVIF Camera
Each source type is explained in detail in the following sections.