First Start and Initial Configuration
First Application Start
After installation, ITVDesk can be started manually from the desktop or application menu. On supported systems, the application can also be configured to start automatically with the operating system.
When started, ITVDesk runs as a background application and becomes accessible through its user interface.
Initial Startup Behavior
On first launch, ITVDesk performs basic initialization and prepares the system for streaming and ONVIF operation.
During the initial startup:
- Default configuration is created
- Network interfaces are checked and detected
- Streaming and ONVIF services are initialized
No user action is required during this process.
ITVDesk uses a GPU-accelerated media architecture (where supported), with an optimized multi-threaded CPU path as automatic fallback. This ensures stable, low-latency operation in both desktop and server environments.
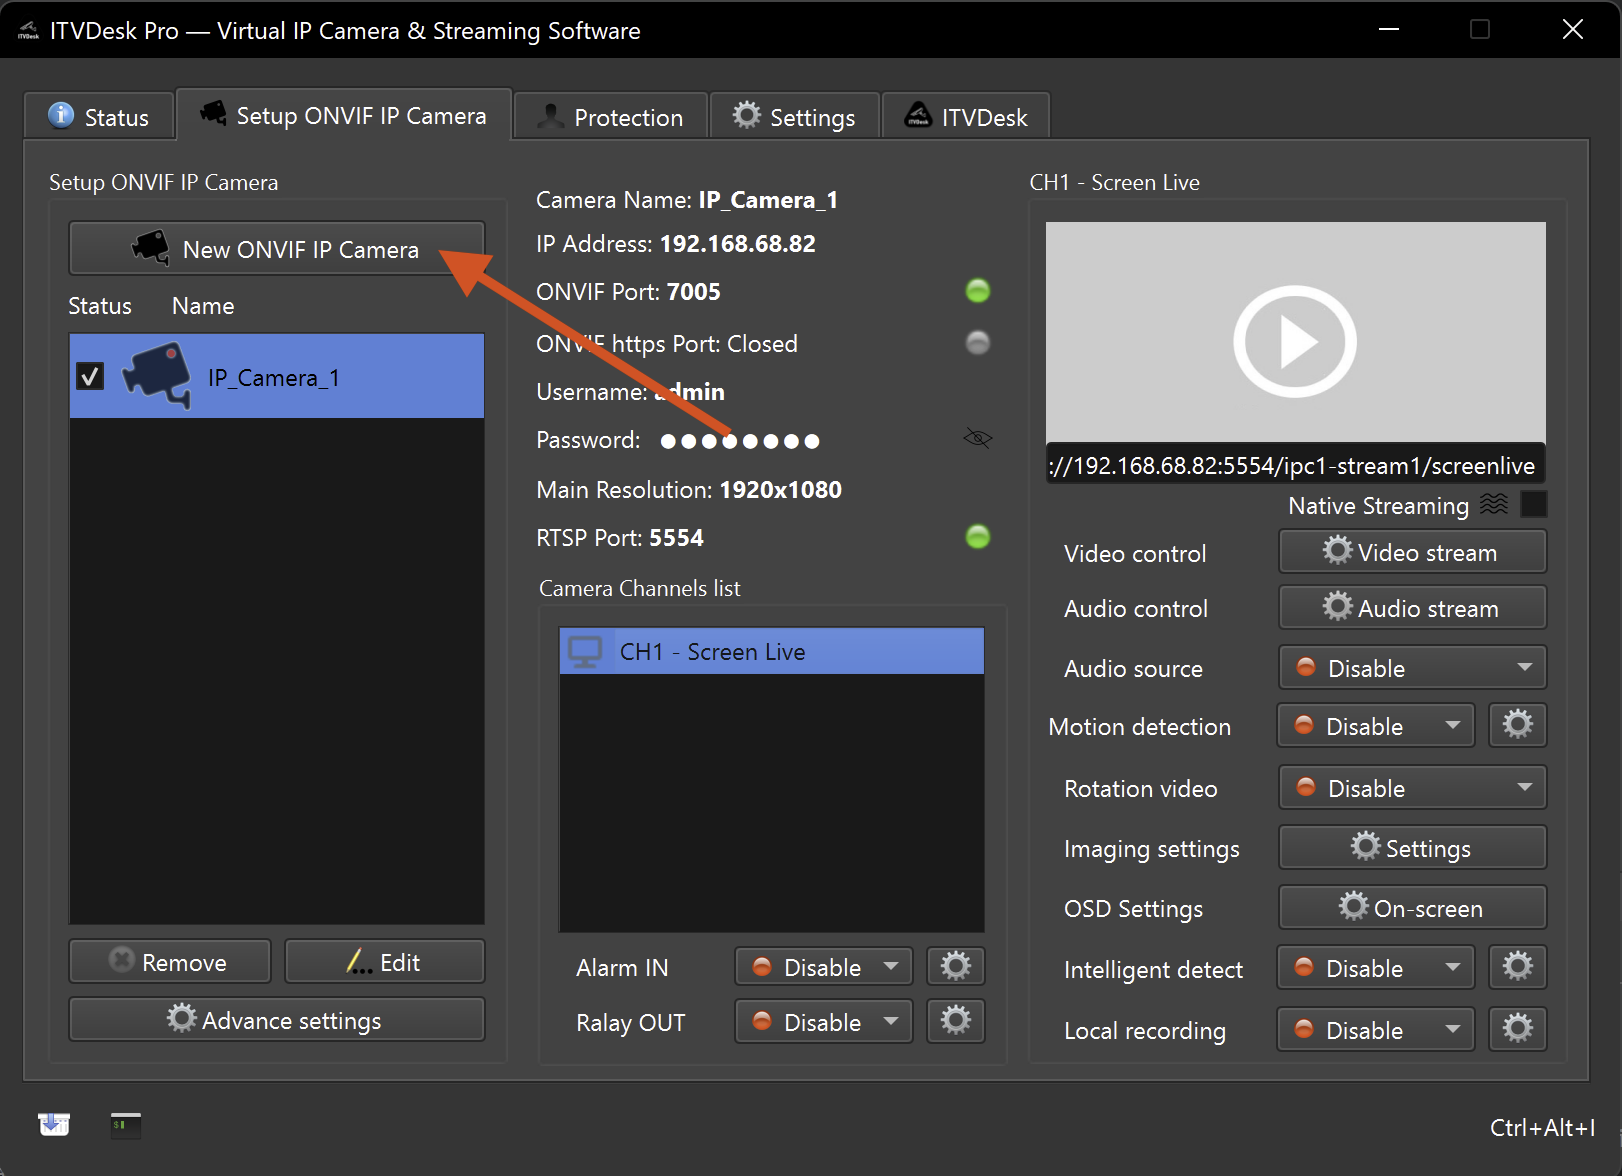
User Interface Overview
The ITVDesk user interface allows configuration of:
- Video sources (desktop, application windows, combined streams, webcam, media files, audio input, ONVIF IP cameras, media pusher, external media servers)
- Stream layout and appearance, including mixing multiple sources into a single stream
- Streaming parameters (resolution, bitrate, frame rate, codec)
- Local recording settings (enable recording, storage location, format)
- Network and ONVIF settings
- Security and access options
Most changes can be applied in real time without restarting the application, unless otherwise indicated.
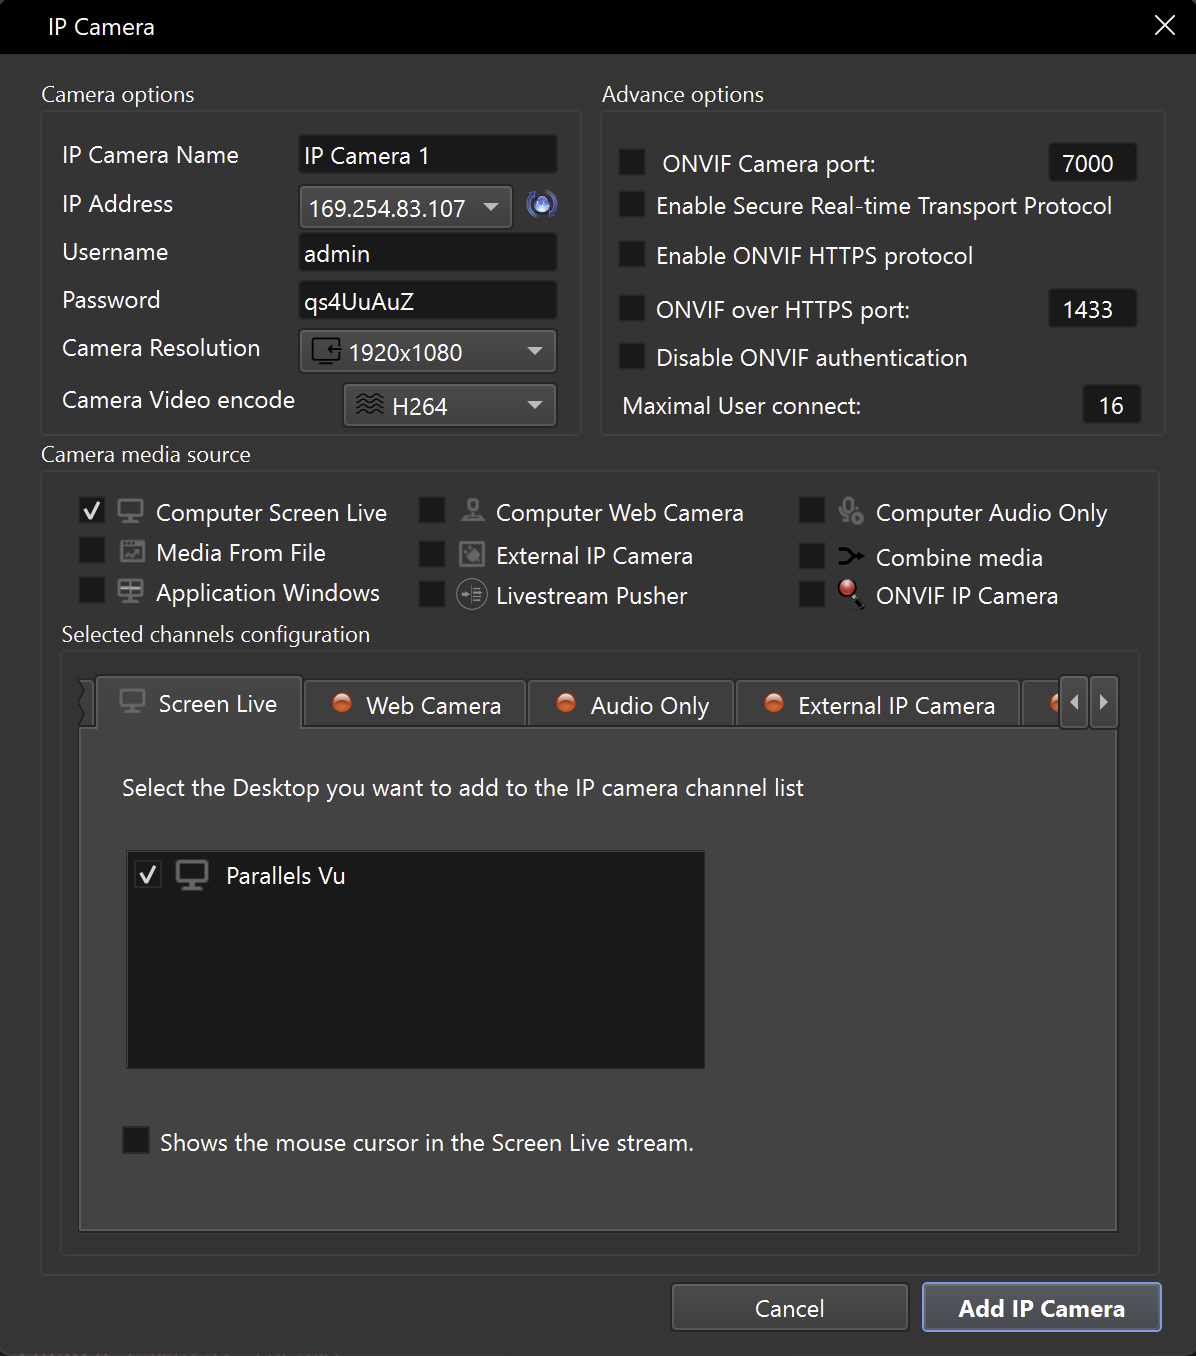
Selecting Video Sources
ITVDesk supports multiple video input sources.
Available source types include:
- Desktop capture
- Computer webcam
- Computer audio only
- Combined media sources in a single video stream
(desktop, webcam, application window capture) - Application window capture
- Media file playback (*.mp4, *.flv, *.jpg, *.jpeg, *.mp3)
- External IP camera streams (RTSP, RTSPS, SRT, RTMP, RTMPS, MJPEG over HTTP)
- Live stream pusher
- External ONVIF IP camera
One or multiple sources can be enabled and combined depending on the selected configuration.
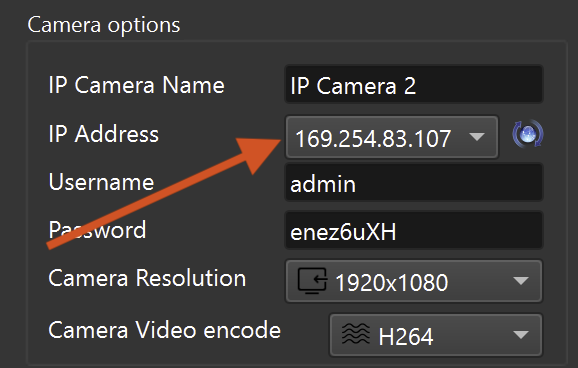
Network and Interface Selection
If the computer has multiple network interfaces, ITVDesk allows selecting the desired IP address for streaming and ONVIF services.
This ensures proper operation in systems with:
- Multiple network adapters
- VPN connections
- Virtual network interfaces
- Dual network stack (IPv4 and IPv6)
Selecting the correct interface is important for successful ONVIF discovery and reliable network access.

ONVIF and RTSP Availability
After startup, ITVDesk becomes available on the local network as a standard ONVIF-compliant IP camera.
- ONVIF discovery allows automatic detection by compatible VMS and NVR systems
- RTSP and RTSPS streams can be accessed by supported media players and clients
Video parameters can be configured:
- Locally through the ITVDesk user interface
- Remotely through compatible ONVIF clients where supported
- Via standard ONVIF controls, just like with a physical network camera
Basic Verification
After completing the initial setup, perform the following checks to verify that ITVDesk is configured correctly and ready for use:
- Confirm that ITVDesk is running and that a valid license is installed
(Trial or activated license) - Verify that the selected video source is active and assigned to the virtual camera
- Check that the selected IP address matches the correct network interface
- Verify ONVIF discovery from a compatible VMS or ONVIF client
- Test RTSP stream playback using the ITVDesk test stream button or a compatible RTSP / ONVIF client
Network Camera Advisor & Test (Best Practice)
When adding a virtual IP camera in ITVDesk (or after changing its network, ports, credentials, or stream profiles), the best practice is to run the built-in network tools immediately:
Run Network Camera Test first.
It is the fastest way to confirm end-to-end readiness (bind IP, ports, auth, streams, conflicts, and FFplay probe) before you spend time debugging inside a VMS/NVR.
-
Network Camera Test Use this first. It is the most important readiness test to confirm that everything works (bind IP, port reachability, auth handshake, main/sub profiles, port conflicts, and FFplay probe).
-
Network Camera Advisor Use this to scan the network and quickly review discovered cameras (RTSP URL present, login required, main/sub hints, recommendations).
This prevents most integration issues before connecting the camera to a real VMS/NVR.
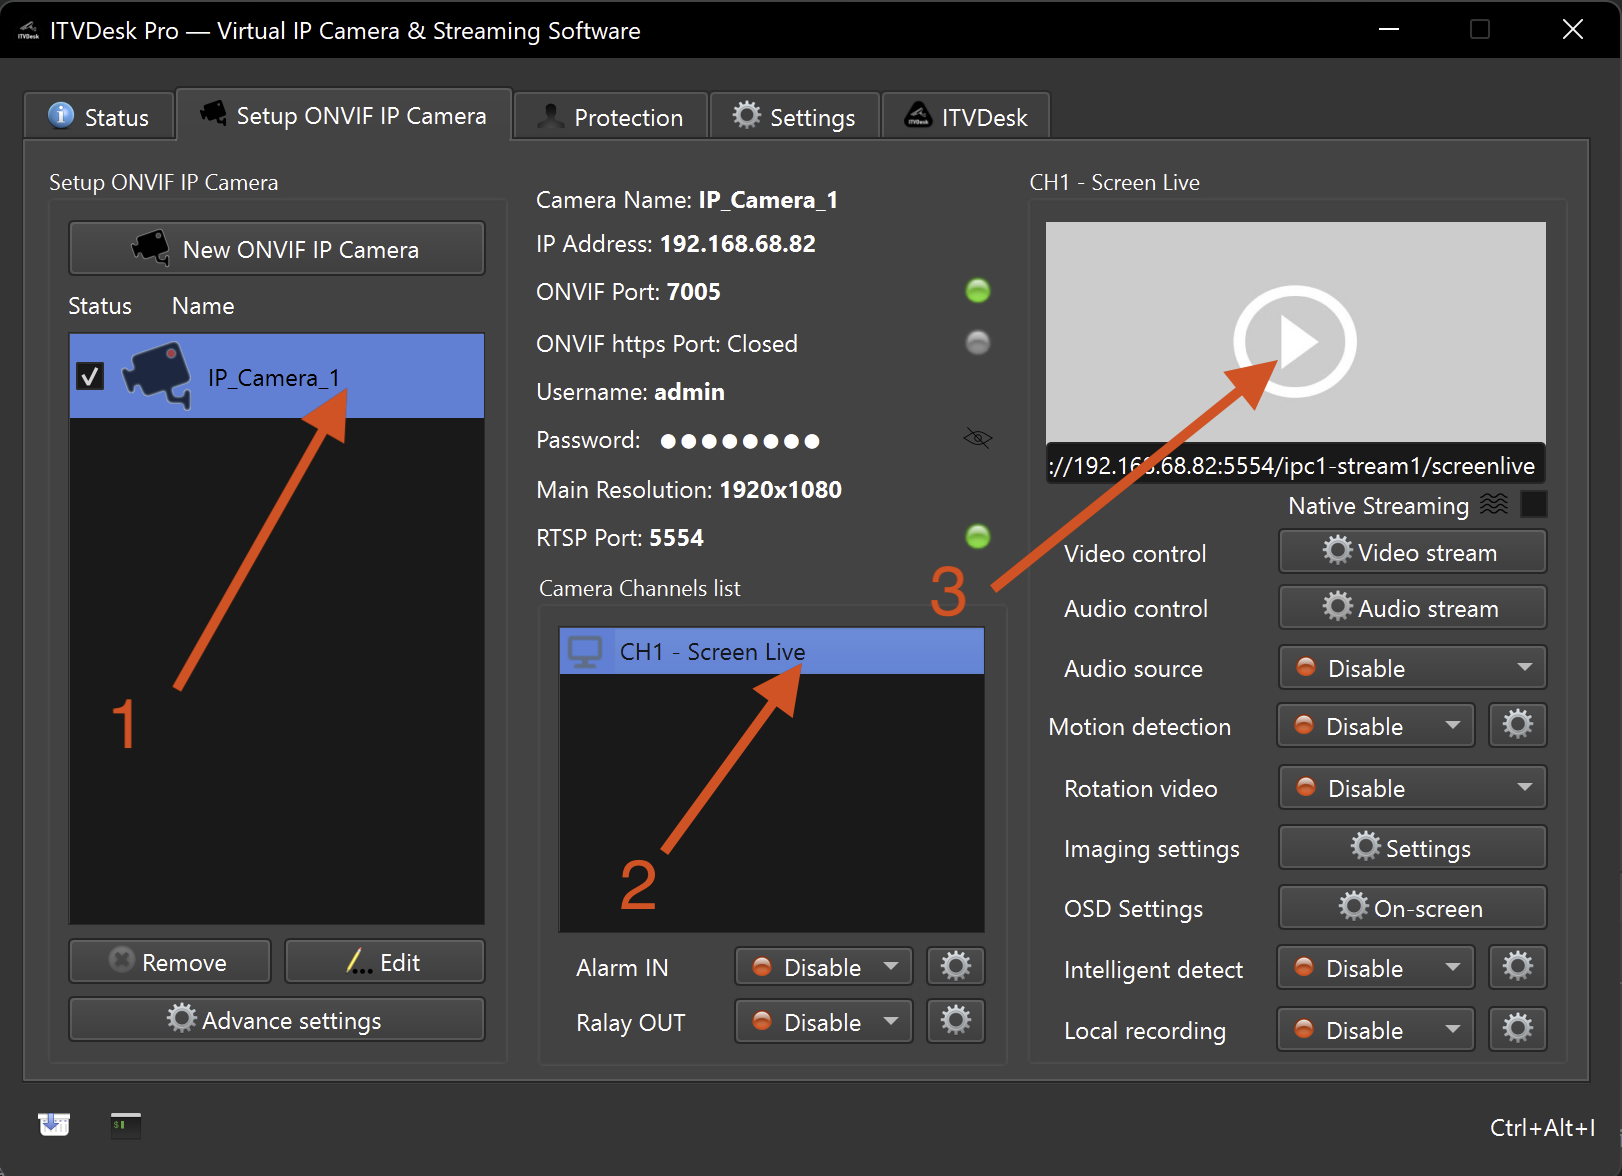
The green status indicators next to the ONVIF and RTSP ports confirm that the services are running correctly and reachable on the network.
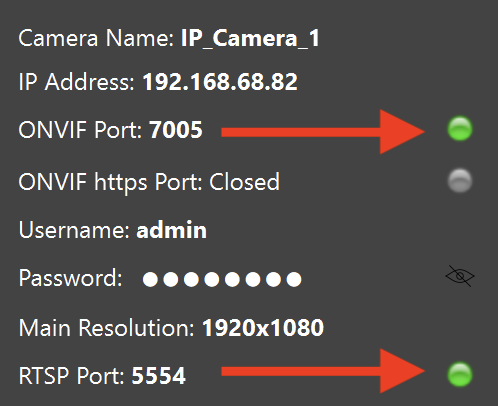
To validate the video output, click the Test / Play Stream button once. This starts a test stream and confirms that the RTSP URL is working correctly.
If the ONVIF device does not appear immediately in the client or VMS, wait a few seconds and refresh the device list.
If all checks pass, ITVDesk is ready for use.
Next Steps
After completing the initial setup, continue with:
👉 Adding the First Video Source
Configure your first desktop, webcam, application window, combined stream, or
external RTSP / ONVIF camera source.
Once the first video source is added, ITVDesk is ready for integration with your VMS, NVR, or RTSP / ONVIF-compatible client.